
How to create your own gorgeous gallery wall
/The ultimate guide to a staircase gallery wall
Build a unique and personal gallery wall for your staircase
Creating a gallery wall is a very easy update to your home decor. Much like using paint or wallpaper to create an accent wall, a gallery wall makes a statement. Think of it as one cohesive art installation you are putting on display. I’m going to share my best tips on how you can create your own unique gallery wall.
Be sure tp pin this post if you want to save it for later!

Create your own unique gallery wall to easily freshen up you home decor #diygallerywall #diyart #freshhomedecor
Add character, personality, and colour to your home decor with a DIY gallery wall
I will admit I dragged my feet on this project. I put it off since the summer because I thought it would take too much time and effort, but I’m so glad I finally tackled this project. Creating a gallery wall is so simple and fun. Don’t overthink it!
Sure, you can buy a set of framed wall prints in a particular theme (think botanicals, abstract images, landscapes) and hang them but making your gallery wall personal is way more special.
Set up your own gallery wall that is unique, adds character, and a punch of colour to your space. #homedecor #gallerywall #diyart
A modern beach-themed gallery wall
A beach-y coastal modern vibe is what I’m going for with our home decor, for a touch of summer year round. Summer is my favourite season hands down. I love going to the beach. I’d live at the beach if I could. You pretty much have to drag me away when I’m there.
After painting my staircase with Chalk Paint by Annie Sloan in a cool pale grey with the slightest blue undertone that reminds me of the Atlantic ocean (mixing Old White with Chicago Grey), I knew the staircase gallery wall I’ve been wanting to curate would have to be beach inspired. Many of my favourite photos are ones from over the summers, hanging at the beach, and of beautiful sunsets over the ocean. Plus, I’ve been wanting to display a piece of my very own sea glass art.

planning, prep, and patient are key to curating your own gallery wall to freshen up your home decor. #gallerywall #designinspo #freshhomedecor
How to plan a gallery wall
Over time I collected frames in various sizes, colours (in sunset hues), and textures. I curated my favourite photos from time spent at the beach in recent years. I bought a weaving that reminds me of ocean waves. I created my own sea glass art from my collection of beach treasures.
Then I got to work.

curate an eclectic mix of frames in a variety of styles, colours, and textures to make your gallery wall look good. #art #homedecor #gallerywall #diyhomedecor
Gallery Wall Ideas
Collect & curate artwork for your DIY gallery wall
Collect or curate items and pieces over time for your wall. You can pick a theme (wildflowers or botanicals), special event (school pictures or birthdays), a set of memories (family, vacations, or friends) or a favourite thing (a city, a place, or a hobby). I wanted a personal coastal, beach-inspired touch of summer year-round.
Mix the style, colour, and textures of frames
For your DIY gallery wall, you could go with the same style of frame in different colours, or the same colour frame in different sizes and style. Go monochromatic with black or white frames and b&w photos. I chose an eclectic mix of different colours, textures, and styles of frames. I picked natural tones and colours that remind me of the sand, the ocean, and sunsets on the beach.
Select different types of art to make your gallery wall unique
Use a mix of photos and art prints along with other art mediums. I included digital prints of family photos, sea glass art that I made myself from my collection of sea glass, a professional print I purchased through a fundraiser, an illustrated digital print, a painting, and a woven wall hanging Fringe Street Designs. I even hung a seashell to fill up an empty space.

collect a variety of art in digital prints, paintings, illustrations, and woven or knit pieces to make your gallery wall unique. #diygallerywall #photowall #framedart
How to arrange a gallery wall
A DIY gallery wall that looks good takes thoughtful preparation and planning.
I suggest you measure how much space you have to work with, then spread your collection out on the floor. Arrange your items and space them out, playing around until it looks—and feels—good. Think about whether you want neat and tidy rows, or an eclectic, random arrangement. For a gallery wall along a staircase, I think a more organic, random layout that flows with the stairs is best.
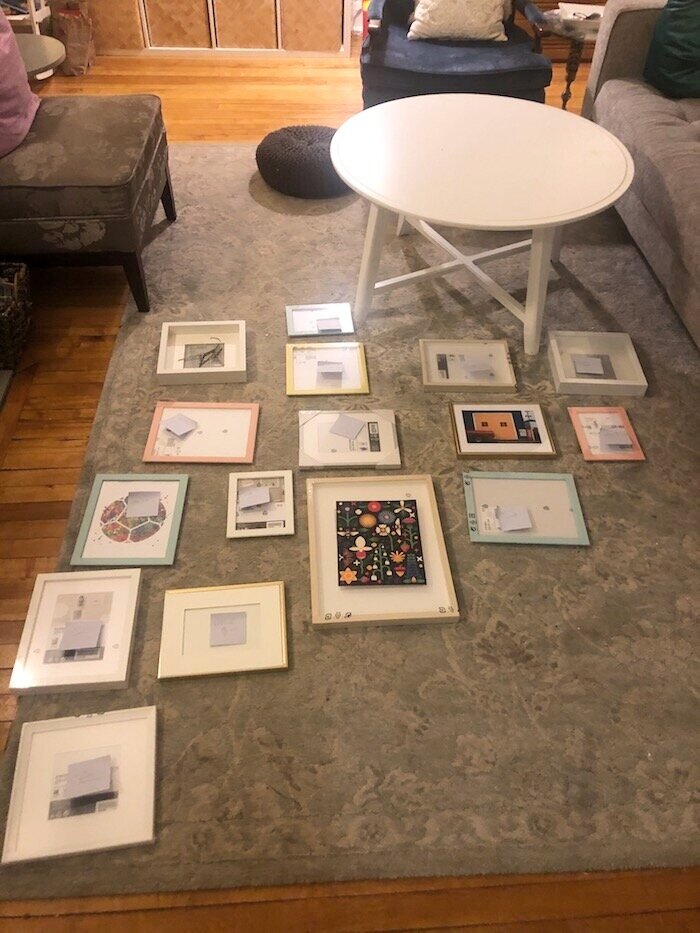
measure out your space and arrange your gallery wall art on the floor before hanging it on the wall. #gallerywallideas #gallerywallart #diyhomedecor
Quick tips for the best way to arrange pictures for a gallery wall
Start with your largest piece of art and fit the rest into the space.
Try to create some balance between the sizes and colour of artwork.
Mix up hanging your frames horizontally and vertically.
Make a gallery wall template
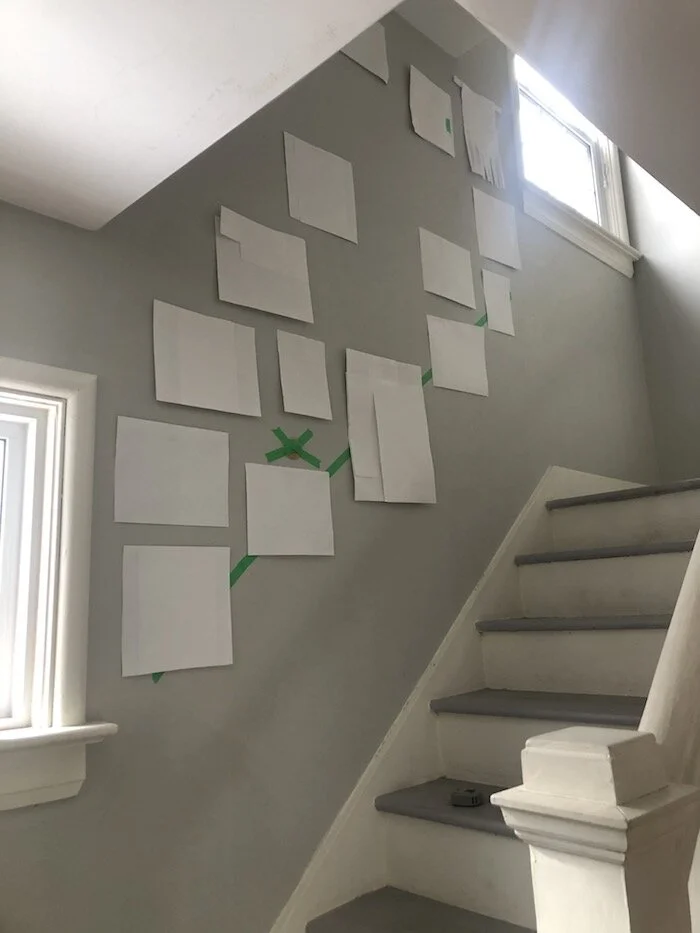
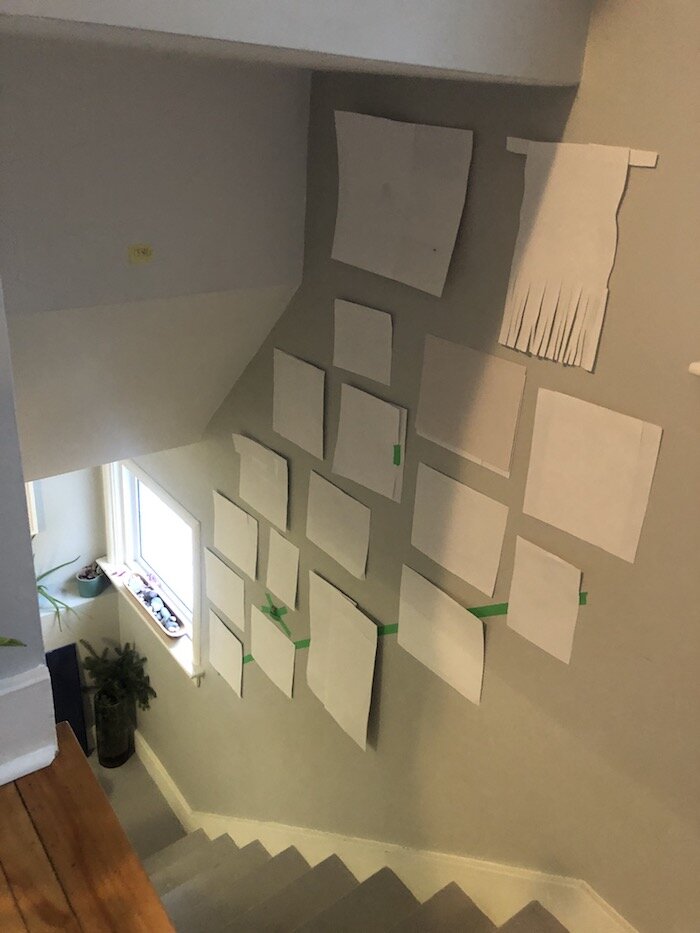
Take the time to cut out paper in the sizes of everything you are hanging so you can easily map your gallery wall out directly in your space. Don’t forget to mark each paper with which frame it is and the piece of artwork it contains. Also mark where the hook sits so you know where to hang the nail to hang it. This will save you so much time later.

make paper templates of the art you want to hang on your gallery wall so you can move it around to arrange it first. #freshhomedecor @artinspo #designinspo
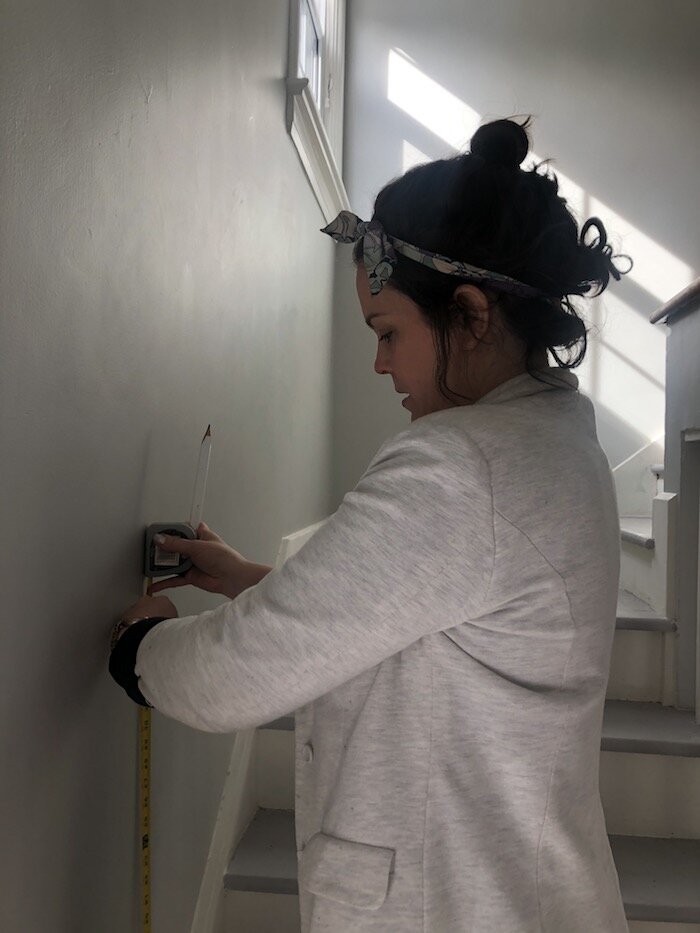
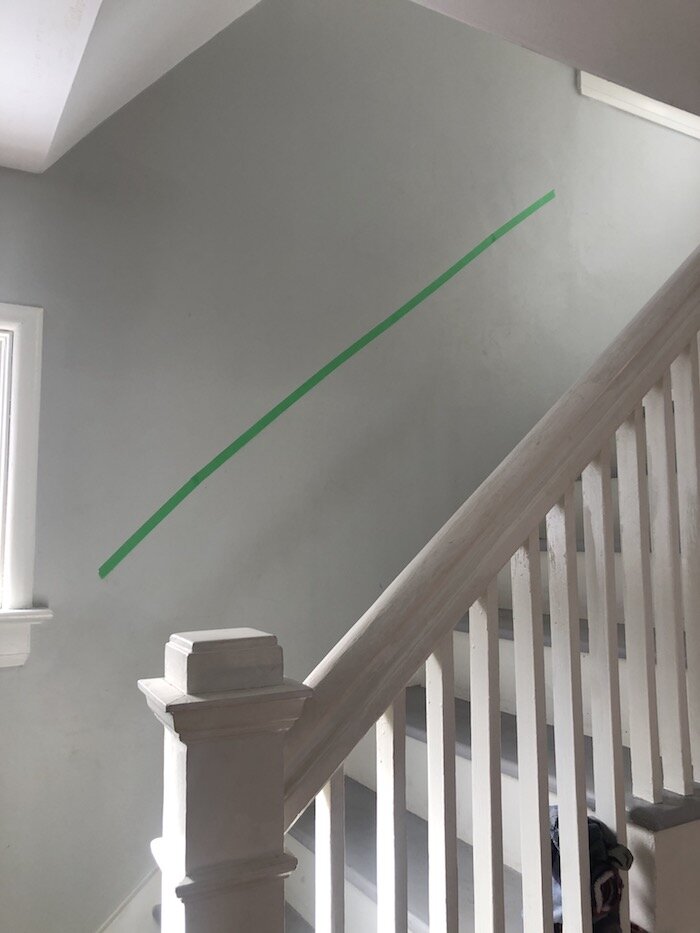
Measure an equal distance up from the centre of each stair and make a mark on the wall. Run a strip of painters tape from the bottom mark to the top mark. This is your centre line. You can line up the bottom, top, or centre of each frame with these marks to easily create consistency along the rising staircase, following the flow of the stairs and working your way up, then filling in the rest of the space.
Use painters tape to hang all the paper templates up (mimicking your layout on the floor) and get a feel for your display. Move things around, adjusting until you have it just right. Make sure to take a step back and take a look from a distance, and all angles.
Keep the art equal distances apart. Aim for between three to six inches of space all around each piece of art to leave some breathing room.
How to hang a gallery wall / Gallery wall hanging tips
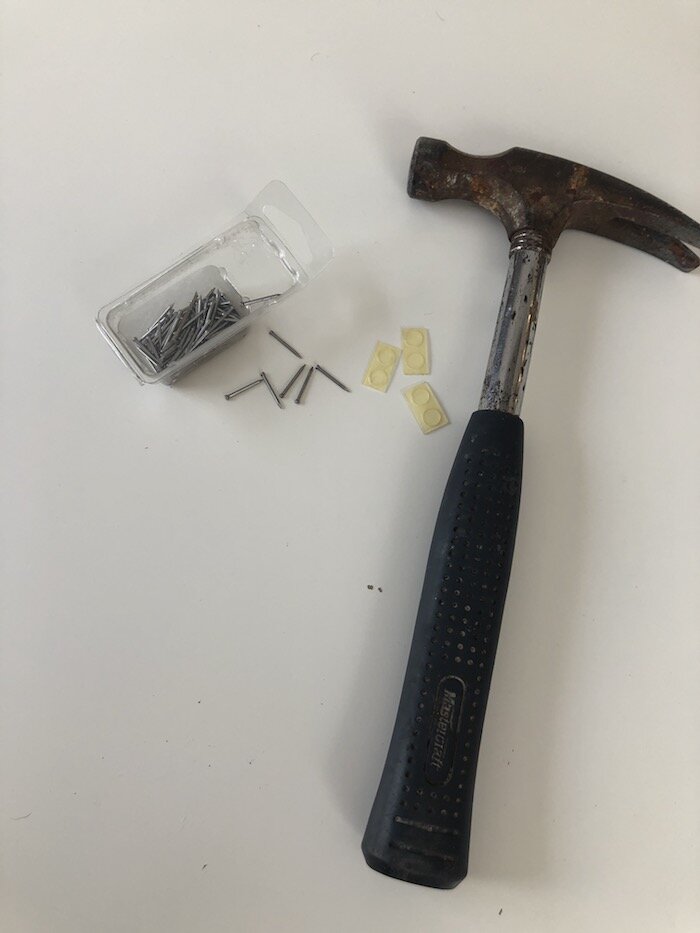
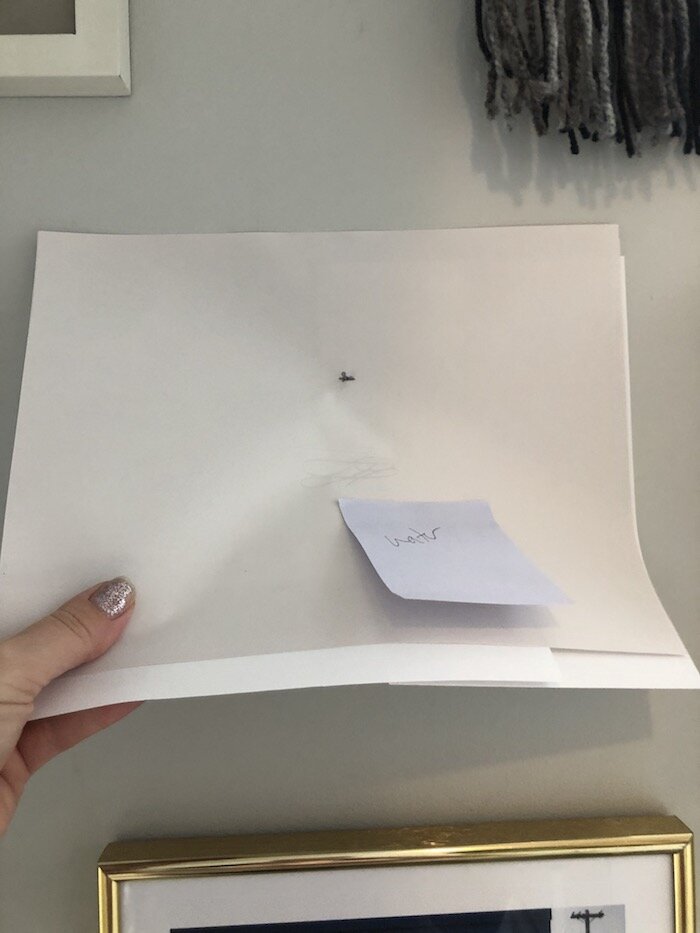
Use a pencil to lightly mark the top corners of where your frames will sit, or where the nail or hook needs to go. You can do this directly on the paper templates you’ve hung. You can hammer your hooks and nails directly through the paper, then remove the template, and replace it with the framed artwork.
Be sure to use a level to line everything up.

And remember: don't overthink your gallery wall project. Your pictures and artwork can always be updated and swapped out whenever you want. You can start small and build your beautiful and unique gallery wall up over time, or plan and curate it in advance to hang your new art installation all at once for maximum wow factor.

curate your gallery wall over time and hang your personal art installation all at once for maximum wow factor. #diygallerywall #gorgeousgallerywall #freshhomedecor
10 tips to ensure your gallery wall looks good
Curate a mix of art that you want to showcase (mix mediums, colours, and style of frames, or go monochromatic)
Make paper templates of the artwork you want to hang
Create a centre line on the wall with painters tape to use as your base
Tape the templates to the wall and play around with the layout
Start with your largest piece of art and fit the rest into the space
Leave space between each art piece, try three or six inches
Mix up hanging your frames horizontally and vertically
Try to create balance between the sizes and colour of artwork
Hang hooks directly through the paper templates, remove paper, and replace with artwork
Use a level to line everything up
Bonus tip: For frames that don’t rest flush against the wall, use these little round bumper pads on the bottom corners of your frames. They’ll help your frame rest smoothly against the wall, and provide a tread so the frame won’t move back and forth so easily (great for when little hands come by if your art is hanging in a high traffic area within reach).

use these rubber bumpers on the bottom corners of your frames to help them rest flush along the wall and stay put. #diygallerywall #wallart #homedecor #tips
Follow me on Instagram @theheatherchronicles


More from The Heather Chronicles


Top 10 must-have home decor pieces to freshen up your space